Want the full AD-Free, printable PDF version of this pattern? Click here to get it on Etsy
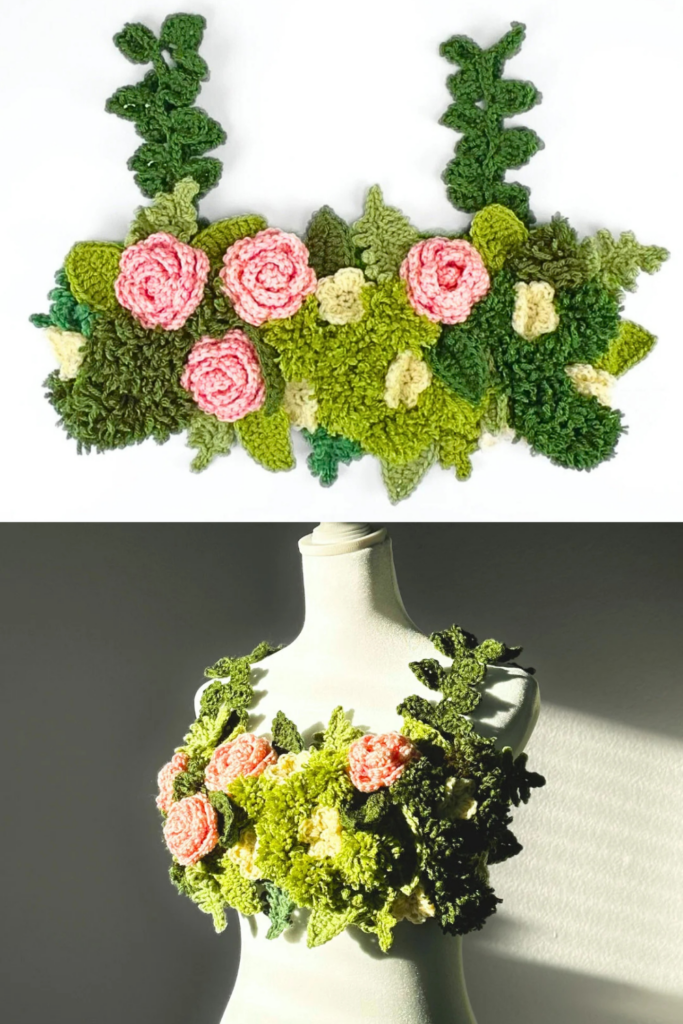
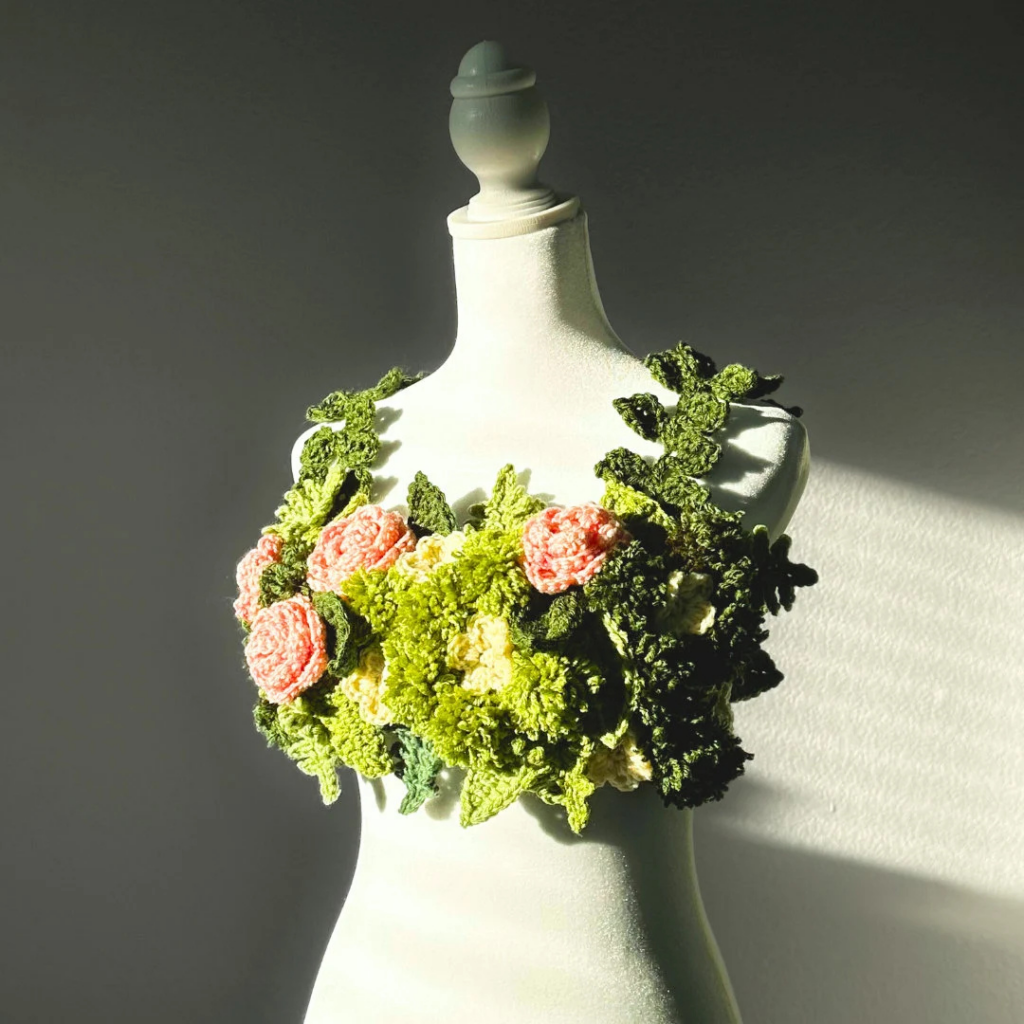
The Garden Fairy Top is a fantastical and fun crochet project and, by far, one of my favorite designs. This crochet top can be fully customized for the amount of coverage you need and uses measurement-based sizing, so your top will fit you or any size that you need.
Whether you’re creating a magical look for the ren faire or simply embracing your inner fairy, this crochet top is the project for you.

Tips for Success
Before you dive into this crochet project, here are a few helpful tips to ensure your top turns out just as magical as you imagined:
- Customization: This pattern is fully customizable to fit your body shape. The mesh base is designed to stretch, allowing for adjustments in size and coverage. Feel free to experiment with the number of floral pieces or the fit of the straps to make the top yours. It doesn’t have to be a crop top – I’m dying to see someone crochet a whole dress!
- Use Stitch Markers: Stitch markers are incredibly helpful for keeping track of your stitches, especially when working with the mesh base or creating the floral pieces. They’ll also help you place your straps evenly.
- Yarn Substitution: While we recommend using Red Heart Solids Acrylic Yarn for this project, feel free to substitute with any worsted weight yarn. Cotton is a great option for warm weather.
Ready to get started? Grab your yarn and hook, and let’s make your new favorite crochet top together!
Materials Needed
For this project, I am using Red Heart Super Saver acrylic yarn, but any yarn will work. Acrylic is great for beginners, especially in solid colors. Cotton is a great alternative if you’ll be wearing your top in hot weather.
375-550 yds Medium Weight 4 Yarn – Red Heart Super Saver
5mm Hook (My FAVORITE crochet hooks!)
Optional – Stitch Markers
Optional – Stitch Counter
Difficulty Level
Intermediate
Gauge
12 DC x 4 rows = 3” x 3”
Size
Customizable to any clothing size – this pattern uses measurement-based sizing.
Terms Used
- CH: Chain
- SL: Slip Stitch
- ST: Stitch
- SC: Single Crochet
- MC: Magic Circle
- HDC: Half Double Crochet
- DC: Double Crochet
- BLO: Back Loop Only
- TC: Treble Crochet
Garden Fairy Crop Top Crochet Pattern
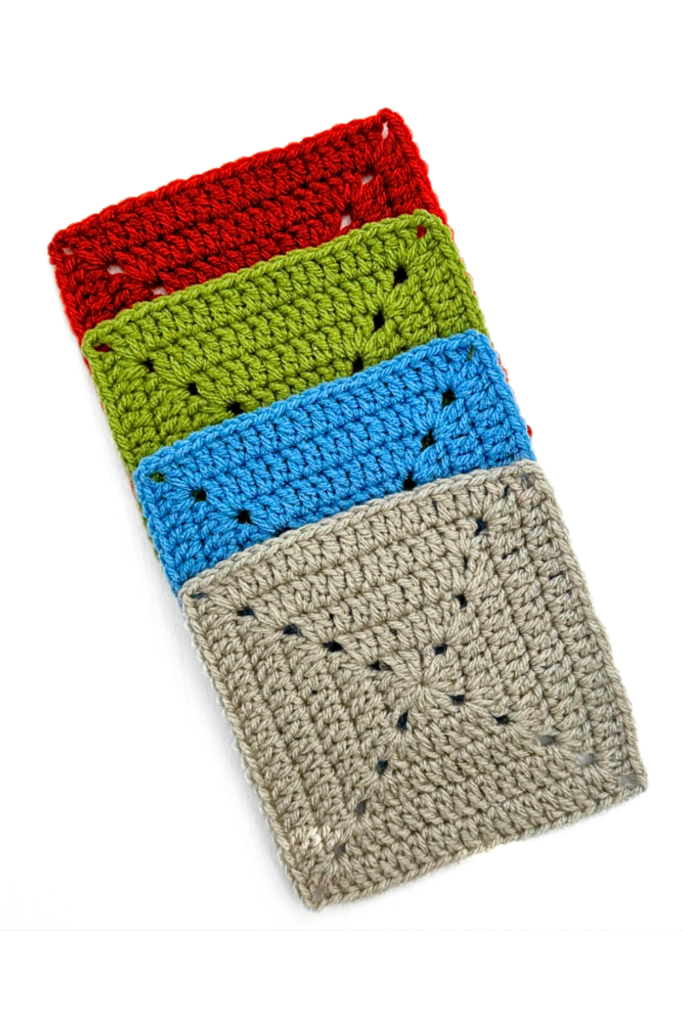
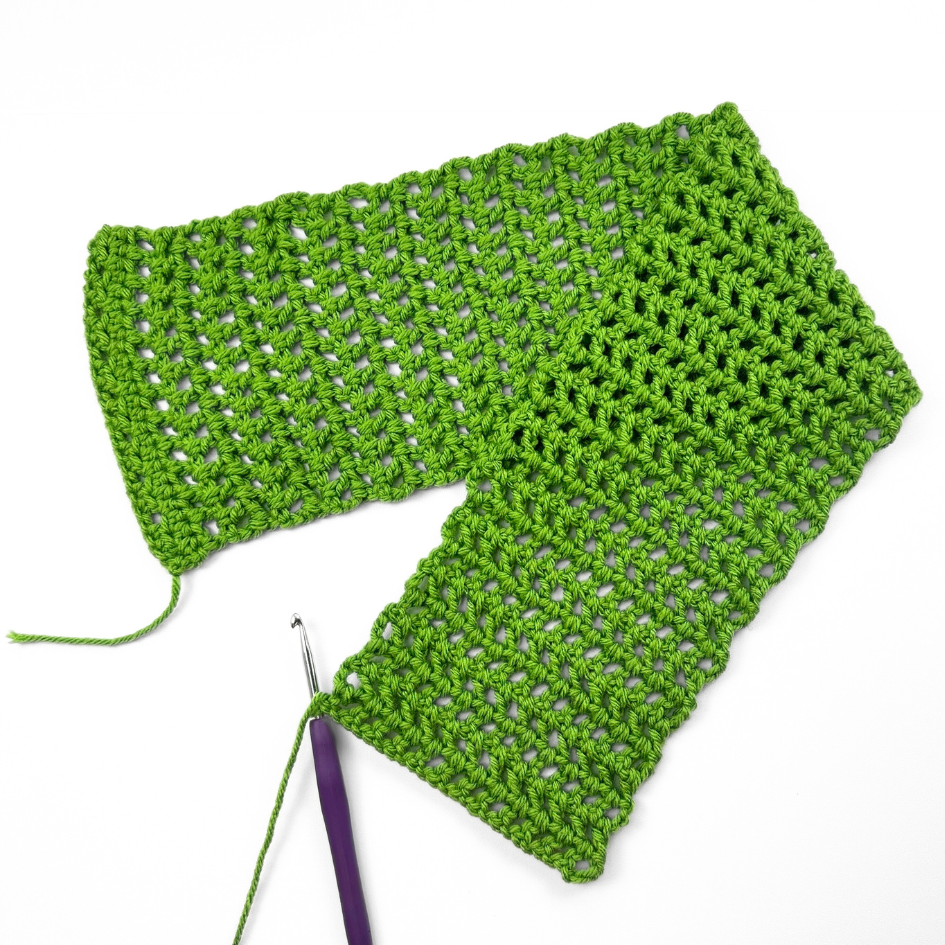
Top Mesh Base
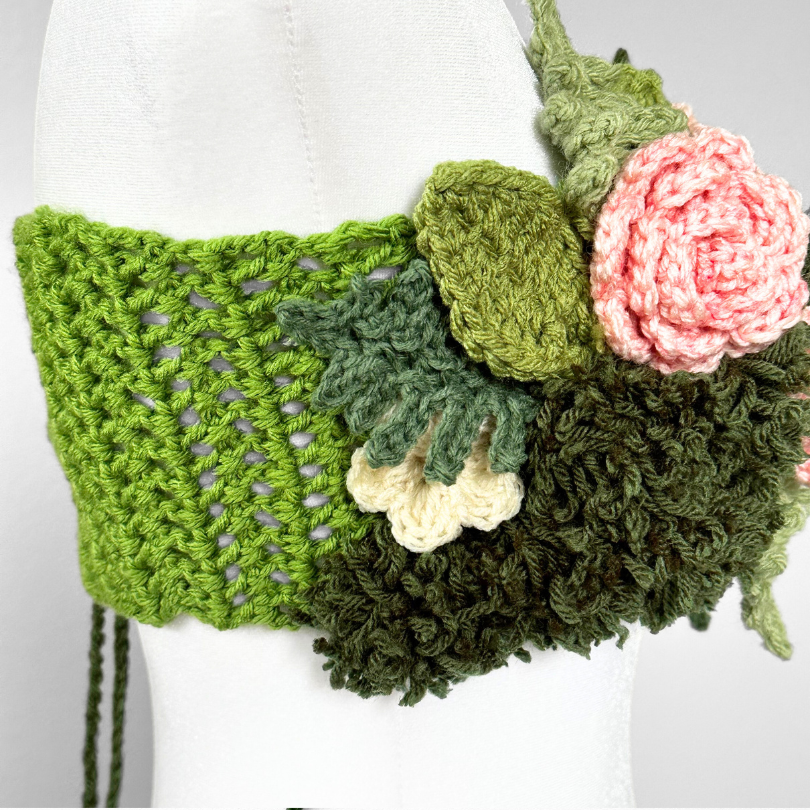
To construct the top, we will first create the mesh base to which we will attach each floral piece. Then, we can begin making each attachable piece to achieve the desired look for our top.
Row 1:
To begin, CH until the desired width of your top. Be sure to hold your chain up to yourself to achieve your desired amount of coverage!
HDC 2 starting in the 2nd CH from the hook. CH 1. Skip 1 ST, HDC 2 starting in the following ST. Repeat this pattern for the entire row (HDC 2, CH 1, skip 1 ST, HDC 2…). This will create the holes for the tie in the back of the top.
Row 2:
CH 1, turn. HDC 1 into each ST and CH 1 space for the entire row.
Row 3:
CH 4 (this will count as 1 DC plus a turning CH), turn. Skip 1 ST, DC 1 into the following ST. CH 1. Skip 1 ST, DC 1 into the following ST. Repeat this pattern for the entire row (DC 1, CH 1, skip 1 ST, DC 1…).
Row 4:
CH 4, turn. DC 1 into the 1st CH 1 space. CH 1. DC 1 into the next CH 1 space. Repeat this pattern for the entire row.
Repeat Row 4 until your top fits almost all the way around you. Keep in mind that the mesh will have some stretch and that we will add another 2 rows for the closure section. Leaving a few inches of space between each closure section at the back of the top will allow for it to be size adjustable! It’s better to have your top slightly small and adjustable rather than too large.
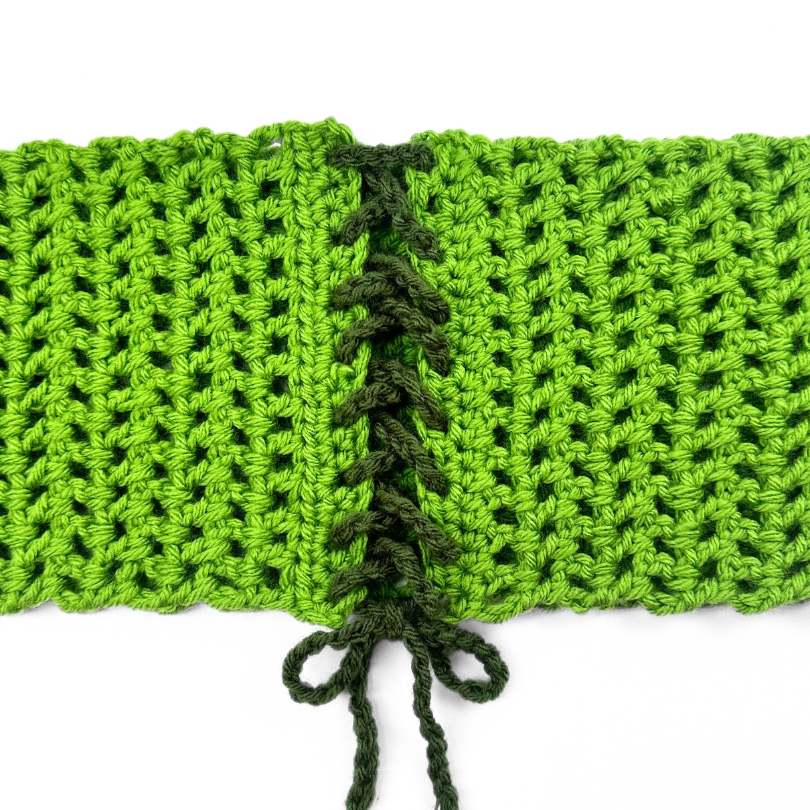
To create the second closure section:
CH 1, turn. HDC 1 into each DC and CH 1 space for the entire row.
CH 1, turn. HDC 2, CH 1, skipping 1 ST, HDC 2 starting in the following ST. Repeat this pattern for the entire row (HDC 2, CH 1, skip 1 ST, HDC 2…). Tie off & weave in any yarn tails.
To create the tie closure for the back of your top, make a chain the desired length of your tie piece, making sure that it is long enough to weave through the back section of your top and still have a bit of length.
Add the tie to the back of your top through the spaces we created in the first and last row of the base and try it on before moving on to be sure that it fits as desired.
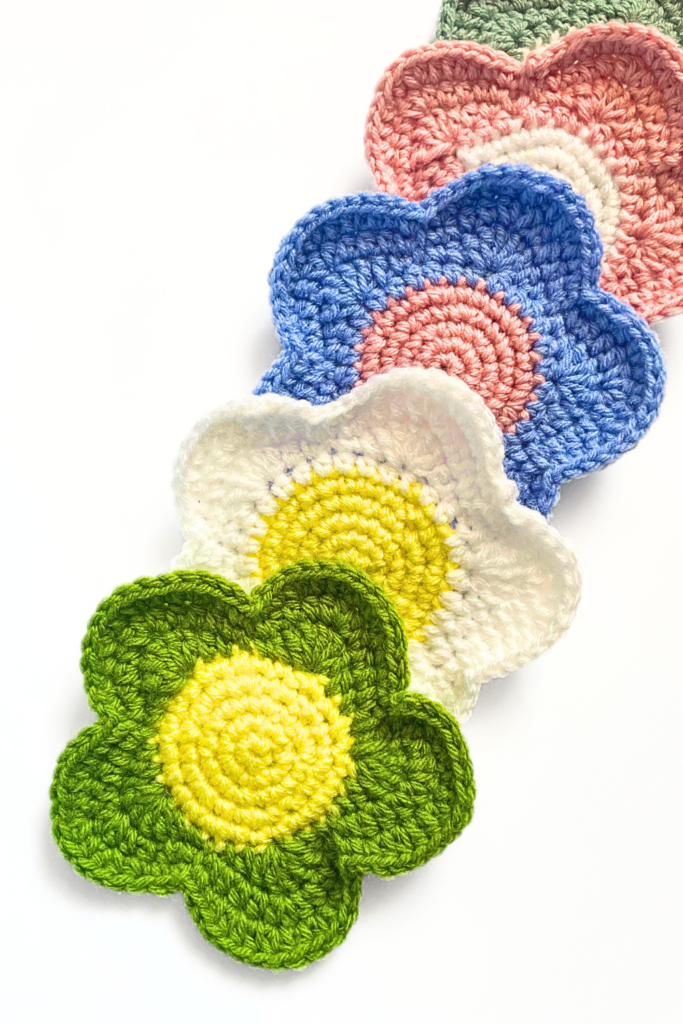
Floral Pieces
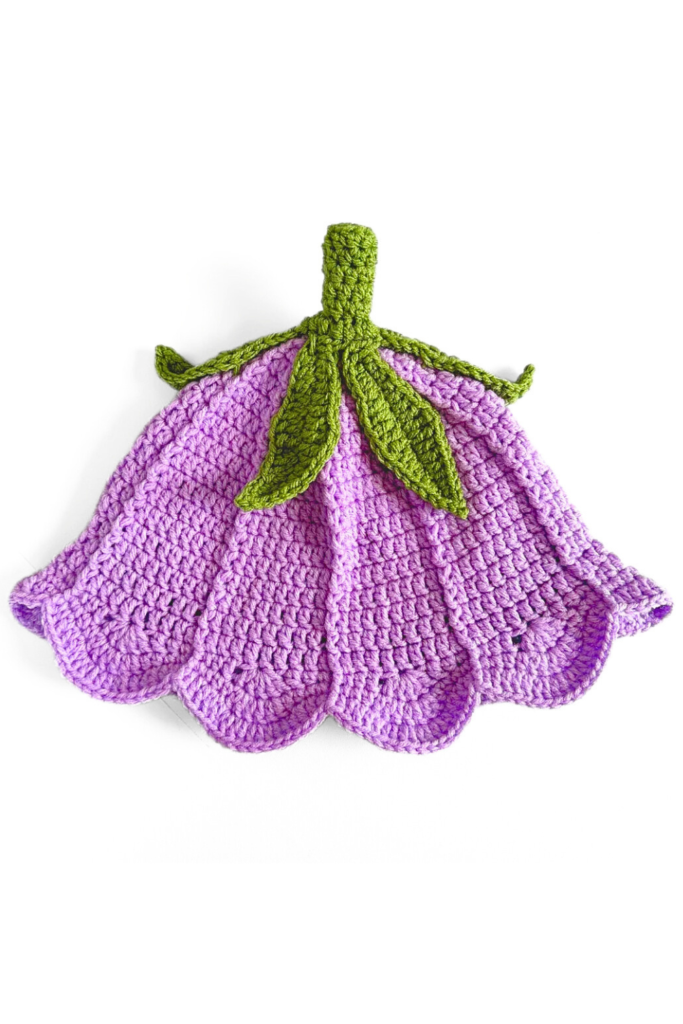
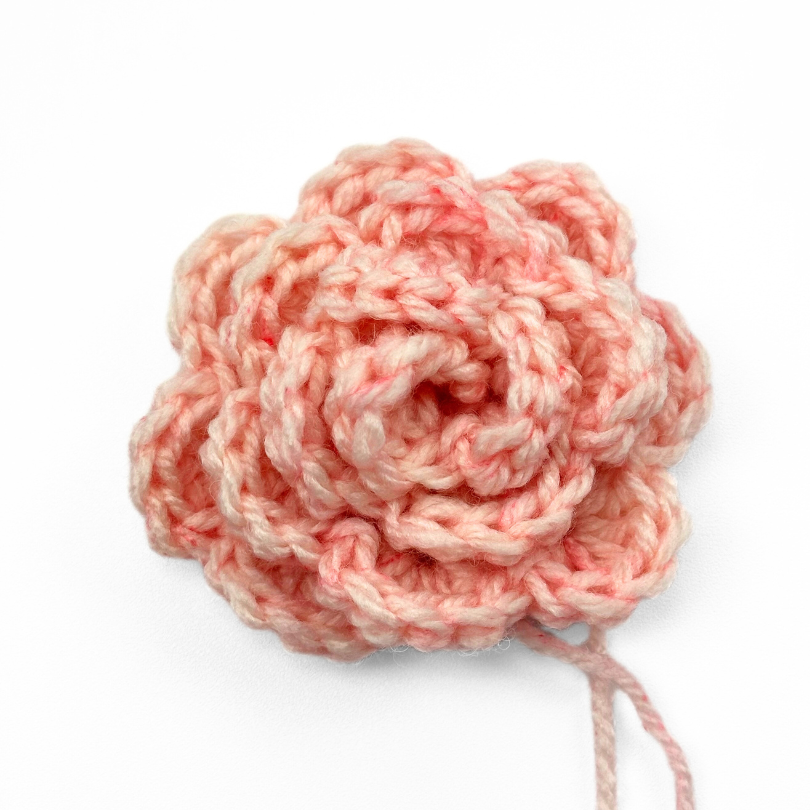
Large Flower
Row 1:
To begin, CH 36, leaving a long yarn tail. For a larger flower, add an even number of chains. SC 1 into each CH for the entire row.
Row 2:
Turn. DC 5 into the 2nd ST from the hook. SL into the next ST. Repeat this pattern for the entire row (DC 5 same space, SL 1).
Tie off, leaving a long yarn tail to sew the flower together and attach it to the top.
To assemble the flower, roll it up and attach the tapestry needle to the first yarn tail. Sew the flower in place at the bottom using the tapestry needle. Tie your yarn tails together to make your flower more secure.
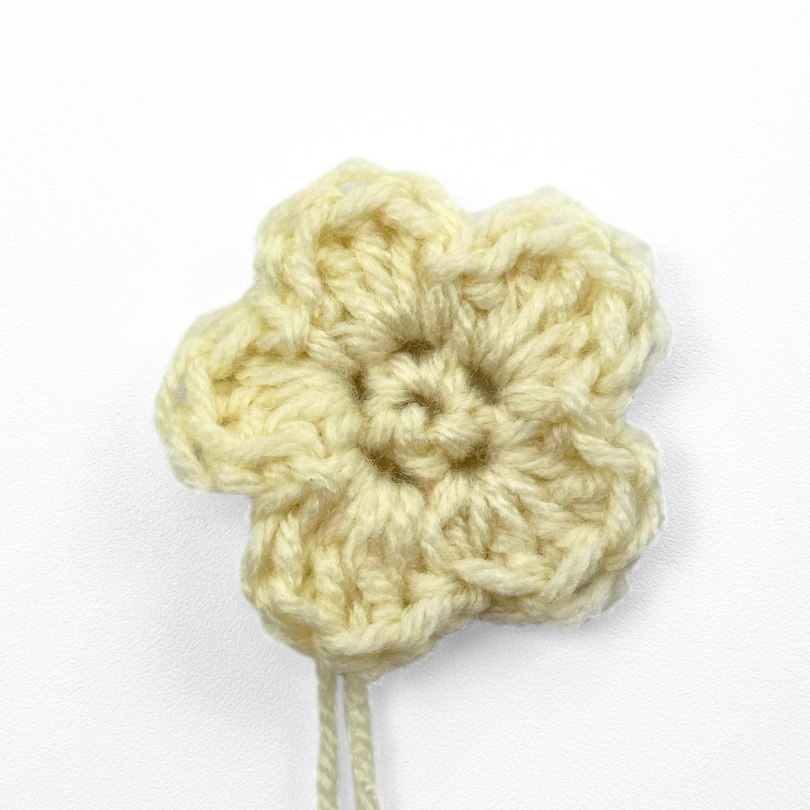
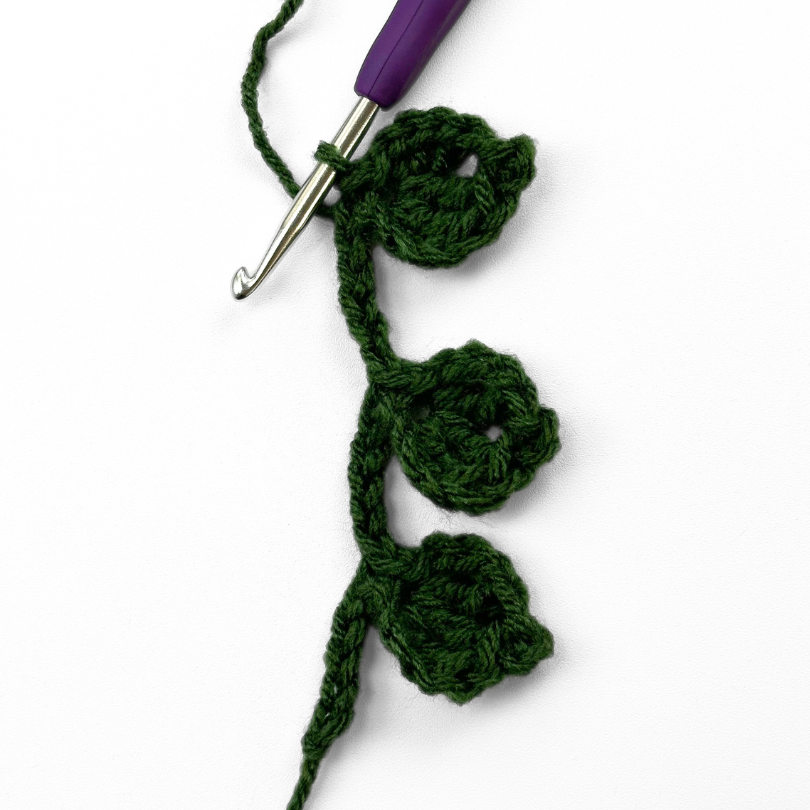
Small Flower
Row 1:
To begin, create a magic circle leaving a long yarn tail. CH 1, SC 5 into the MC. SL into the 1st ST and pull gently on the yarn tail to close the MC.
Row 2:
Into the same space as the SL: HDC 1, DC 3, HDC 1.
[Into the next ST: SL 1, HDC 1, DC 3, HDC 1] x 4.
Tie off, leaving a long yarn tail.
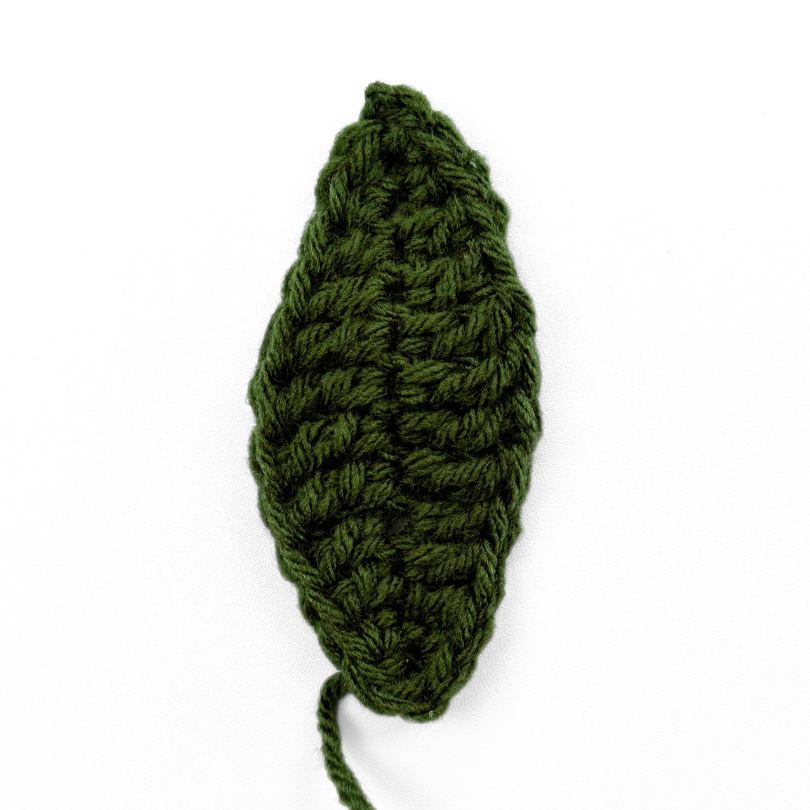
Leaf
Row 1:
To begin, CH 11. SC 1 starting in the 2nd CH from the hook. HDC 1, DC 2, TC 4, DC 2, HDC 1. Into the last CH, SC 2.
Row 2:
Working around into the opposite side of the chain: SC 1, HDC 1, DC 2, TC 4, DC 2, HDC 1, SC 1. Tie off.
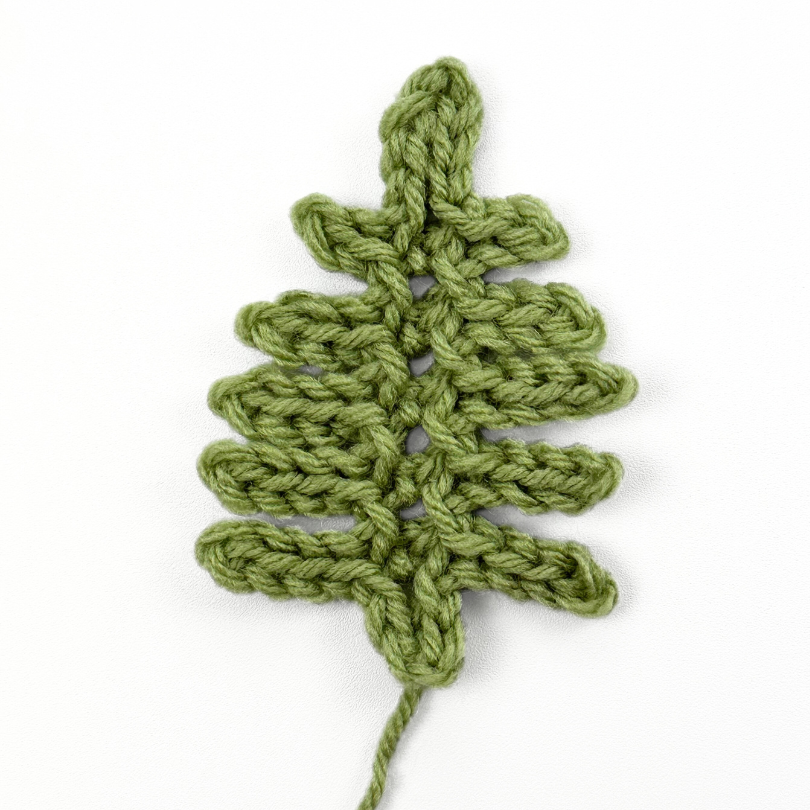
Fern
Row 1:
CH 16. SL 3 starting in the 2nd CH from the hook. CH 3, SL 2 starting in the 2nd CH from the hook. Skip 1 CH, SL 1 into the following CH. CH 4, SL 3 starting in the 2nd CH from the hook. Skip 1 CH, SL 1 into the following CH.
[CH 5, SL 4 starting in the 2nd CH from the hook. Skip 1 CH, SL 1 into the following CH] x 3.
SL 1 into each of the last 2 CH.
Row 2:
Working around into the opposite side of the CH, SL 1 into each of the next 2 ST.
[CH 5, SL 4 starting in the 2nd CH from the hook. Skip 1 ST, SL 1 into the following CH] x 3.
CH 4, SL 3 starting in the 2nd CH from the hook. Skip 1 ST, SL 1 into the following ST.
CH 3, SL 2 starting in the 2nd CH from the hook. Skip 1 ST, SL 1 into each of the last 2 ST. Tie off.
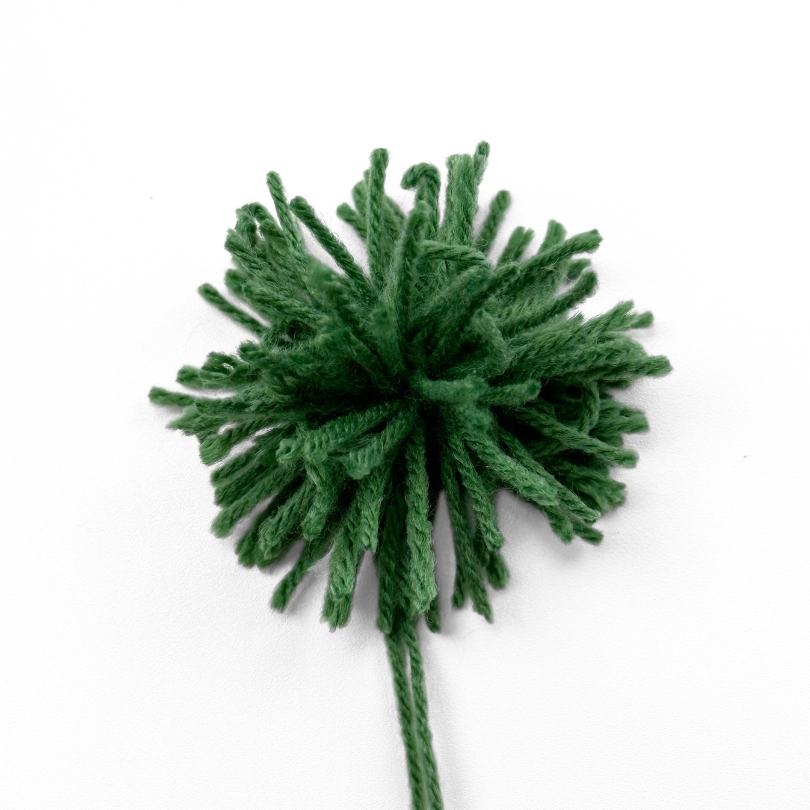
Pom-Pom Moss
Begin by holding the end of the yarn between your thumb and pointer finger. Wrap the yarn tightly around your fingers until you have reached the desired thickness of your pom-pom. Wrapping the yarn around more of your fingers will make it larger, and less will make it smaller.
Cut the yarn and remove it from around your fingers carefully so as not to pull it apart.
Wrap a second length of yarn around your bundle and tie it tightly into a knot, then around to the opposite side of the pom-pom and tie it into a knot again. Cut all of the yarn loops on each side of your bundle, then fluff out the pom-pom. Leave the yarn used to tie the pom-pom together long as we will use it to attach it to the top. Finally, trim down your pom-pom for a neater, denser look.
Straps
Row 1:
To begin, CH 10. TC 2 into the 4th CH from the hook. Create a picot at the top of the 2nd TC by chaining 2, then slip-stitching into the 2 loops at the top of the TC stitch. TC 1 more into the same CH. CH 3, SL 1 into the same CH. SL into the following CH.
Repeat this pattern until you have reached the desired length of your strap. I recommend putting on your top and holding the strap over your shoulder from one side of the top to the other to see where you would like the top to sit once the straps are attached.
Final Assembly
Continue making your floral pieces as you go and attaching them to the mesh base to achieve the desired look. Try your top on occasionally so that you can better see how the pieces will sit. I recommend tapering off your floral pieces on the sides of your top so that your arms can sit flush to your sides.
If you want to wrap the floral coverage all the way around to the back of your top, try using only flat pieces such as the fern, small flower, and leaf around the sides of your top so that your arms can still sit flush to your sides.
Finally, attach your straps to your top using the tapestry needle and either the leftover yarn tails or an extra length of yarn. Use stitch markers to mark the placement of your straps on the front and back of your top before starting to achieve even placement.
In this free crochet pattern, you learned to make the Garden Fairy Crop Top!
{If you enjoyed this pattern, you’ll love this one: Easy Crochet Flower Hat Free Crochet Pattern}
©2025 HyggeCrochetCo All rights reserved. This pattern and its contents are for personal use only. Do not copy, edit, redistribute, or sell this pattern. You are welcome to sell finished products with your own photos in small quantities with credit to HyggeCrochetCo. Thank you and enjoy!