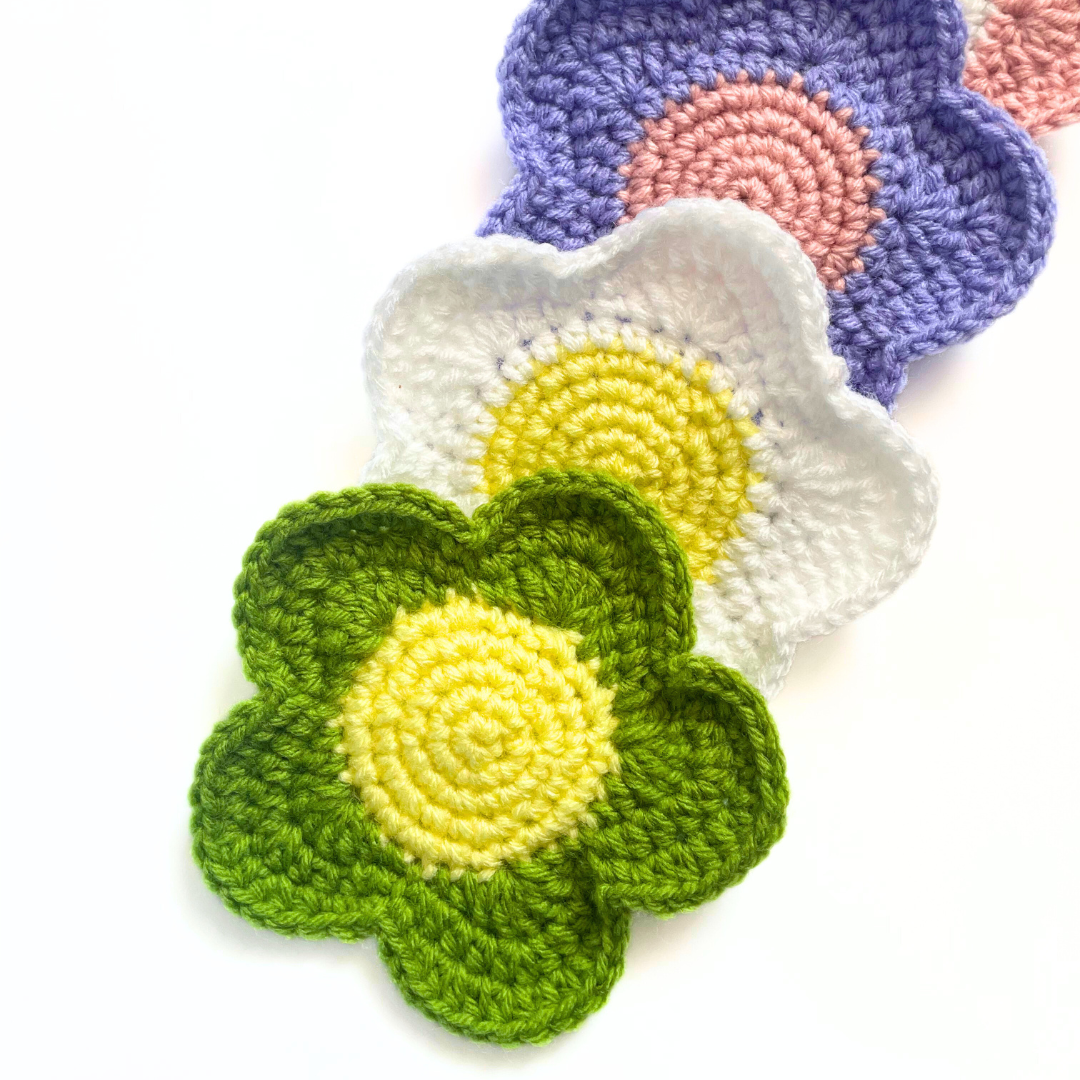
This retro flower coaster crochet pattern is perfect for spring and summer to brighten up your space and works up fast! These coasters look great in a set in a variety of colors and make a fun handmade gift as well.
Whether you’re hosting a gathering or enjoying a quiet moment with a cup of tea, these coasters will protect your surfaces in style.
Want the AD-Free, printable PDF version of this pattern with photo instructions? Click here to get it on Ravelry
For this project, I’m using Lily Sugar’N Cream 100% cotton yarn as it is my favorite both soft and durable cotton yarn.
Any worsted-weight 4 cotton yarn will work for the potholder, however. It is best to use cotton yarn for coasters and trivets as it is better suited to high temperatures, unlike other yarns such as acrylic. If you are using your potholder purely for decorative purposes, feel free to use other yarn types!
For more on the best yarn for your next project, check out our articles:
Best Cotton Yarn for Crochet: The Complete Guide
The Benefits of Wool Yarn for Crochet
Is Acrylic or Cotton Yarn Better for Crochet?
More cotton yarn options for this project include:
Knit Picks – Dishie Cotton Yarn
Premier Yarns – Home Cotton Yarn
MATERIALS
Medium Weight 4 Yarn – Lily Sugar’N Cream 100% Cotton (75-175 yds)
4mm Hook (My FAVORITE crochet hooks!)
Optional – Stitch Markers
Optional – Stitch Counter
Both stitch markers and stitch counters are very helpful for those who easily lose track of their row/stitch counts.
STITCHES & TECHNIQUES
CH – Chain
HDC – Half Double Crochet
SL – Slip Stitch
ST – Stitch
PATTERN NOTES
Skill Level – Advanced Beginner/Intermediate
Measurements – 5.5″ x 5.5″
Gauge – 20 CH = 4″
This pattern follows US crochet terms.
The success of this pattern is not dependent upon yarn type or gauge, however, it is recommended to use cotton or wool yarn for hot drink coasters as they are better suited to high temperatures.
FLOWER COASTERS CROCHET PATTERN
R1: To begin, make a magic circle. CH 1, SC 6 into the magic circle and
pull gently on the yarn to close the circle. SL into the CH 1 space
R2: CH 1, work 2 SC in each ST until the end of the round (12 total), SL
into the CH 1 space
R3: CH 1, [SC 1, SC 2 same space, SC 1, SC 2 same space] repeat until
the end of the round (18 total), SL into the CH 1 space
R4: CH 1, [SC 2, SC 2 same space, SC 2, SC 2 same space] repeat until
the end of the round (24 total), SL into the CH 1 space
R5: CH 1, [SC 3, SC 2 same space, SC 3, SC 2 same space] repeat until
the end of the round (30), SL into the CH 1 space, tie off.
R6: Attach the second yarn color to the edge of the circle. CH 1, HDC
into each ST until the end of the round (30 total), SL into the CH 1 space
R7: CH 1, SL into the CH 1 space, [SC 1, HDC 1 DC 5 same space, HDC 1,
SC 1, SL 1] repeat until the end of the round (60 total), SL into the CH 1
space
R8: CH 1, SL into the CH 1 space, [SC 1, HDC 3, HDC 3 same space, HDC
3, SC 1, SL 1] repeat until the end of the round (60 total), SL into the CH 1
space
R9: CH 1, SL into the CH 1 space, [SC 2, HDC 1, HDC 2 same space, HDC
1, HDC 2 same space, HDC 1, SC 2, SL 1] repeat until the end of the
round (75 total), tie off, and weave in any yarn ends.

Don’t forget to share your finished project with us @hyggecrochetco on TikTok, Pinterest and Instagram so I can like and share!
Have questions about the pattern? Send me a message on Etsy and I’d be happy to help!
©2023 HyggeCrochetCo All rights reserved. This pattern and its contents are for personal use only. Do not copy, edit, redistribute, or sell this pattern. You are welcome to sell finished products with your own photos in small quantities with credit to HyggeCrochetCo. Thank you and enjoy!
-
How to Crochet a Hat for Beginners – Free Ribbed Beanie Pattern
This easy ribbed beanie is a great project for beginner crocheters wanting to learn how to crochet a hat and works up fast! It consists of a basic […]
-
19 Free & Easy Scrubby Crochet Patterns
Tired of the same old crochet projects? Shake things up with these 25 free and easy face and dish scrubby patterns that will add a touch of handmade […]
-
25 Free Crochet Flower Patterns for All Skill Levels
Are you seeking inspiration for your next crochet project? Look no further! Our compilation of 25 free crochet flower patterns covers a wide range of styles and techniques, […]
-
How to Crochet a Solid Granny Square for Beginners
Looking to learn how to crochet a solid granny square as a beginner? You’re in the right place! This easy-to-follow guide will have you creating beautiful granny square […]
-
25 Free Crochet Animal Patterns for Beginners
Calling all crochet enthusiasts and beginners alike! If you’re looking to dive into the world of creating adorable crochet animal patterns without breaking the bank, you’ve come to […]

