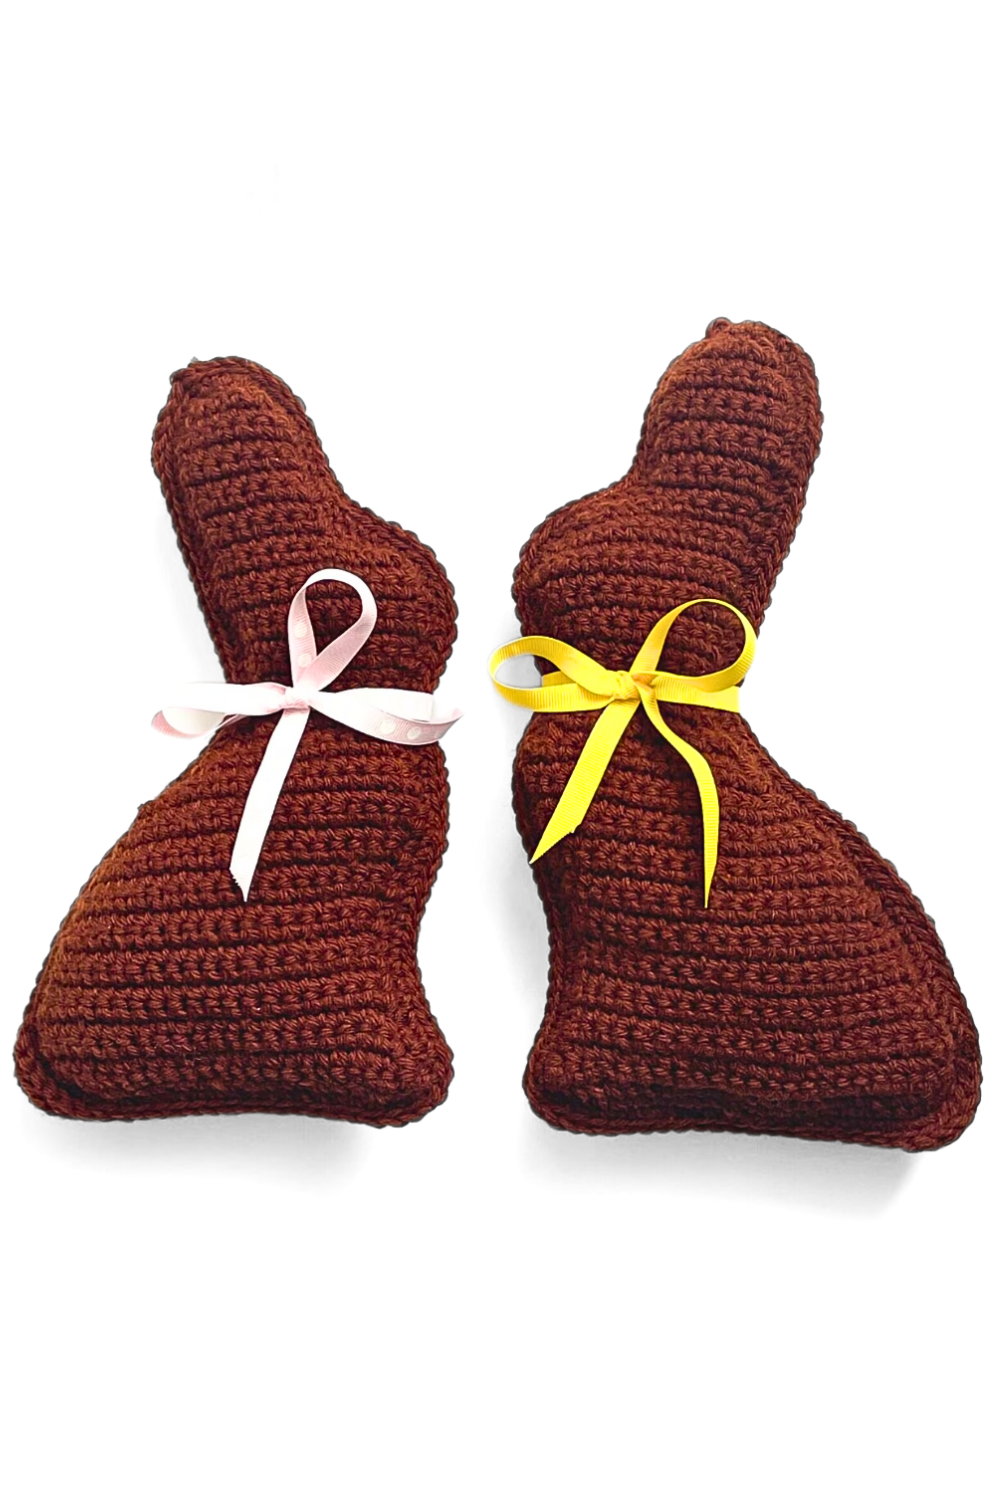
Easter is just around the corner, and what better way to celebrate than by creating an adorable chocolate Easter bunny—in crochet form, of course! This free crochet pattern is perfect for beginners and experienced crocheters alike, and it makes a fantastic Easter gift for family and friends.
So, grab your hooks, and let’s get started!

Want the AD-Free, printable PDF version of this pattern? Click here to get it on Etsy
Add this pattern to your Ravelry Queue and Favorites
This Chocolate Easter Bunny crochet pattern makes the cutest Easter decoration or gift and works up pretty quickly! As long as you are familiar with basic crochet stitches and techniques, this pattern is great for beginner crocheters and more advanced crocheters alike.
Pro Tip: I recommend using a stitch counter or stitch markers for this project because it is very easy to lose count of your stitch or row count which will lead to your chocolate bunny’s head ending up backward!
For this project, I’m using Caron Simply Soft acrylic yarn in Chocolate, but any weight 4 yarn will work fine depending on your preferences.
More yarn options for this project include:
(For a white chocolate bunny) Red Heart Super Saver – White
For more on the best yarn for your next project, check out our articles:
Best Cotton Yarn for Crochet: The Complete Guide
Is Acrylic or Cotton Yarn Better for Crochet?
The Best Yarns for Bathing Suits and Swimwear
Materials
1 Skein Medium Weight 4 Yarn – Caron Simply Soft (Chocolate)
US 4mm/G-6 Hook (My FAVORITE crochet hooks!)
Optional – Ribbon
Optional – Stitch Markers
Optional – Stitch Counter
Both stitch markers and stitch counters are very helpful for those who easily lose track of their row/stitch counts.
Stitches & Techniques
CH – Chain
SL – Slip Stitch
ST – Stitch
SC – Single Crochet
Pattern Notes
Skill Level – Easy/Intermediate
Measurements – 12″ x 6.5″
Gauge – 20 CH = 4″
This pattern follows US crochet terms
This pattern requires basic crochet skills and knowledge and is suitable for beginner crocheters. The success of this pattern is not dependent upon gauge or yarn type.
Chocolate Easter Bunny Crochet Pattern
R1: CH 26, SC into each CH starting in the 2nd CH from the hook (25 total). Be sure to keep track of your row count as you go to avoid mistakes!
R2: CH 1, turn, SC 2 together, SC 24.
To SC 2 together: Insert hook into the stitch and pick up a loop. Insert hook into the next stitch and pick up a second loop. Yarn over and draw through all loops on the hook.
R3: CH 1, turn, SC 2 together, SC 20, SC 2 together.
R4: CH 1, turn, SC 20, SC 2 together.
R5: CH 1, turn, SC 1 into each ST for the entire row.
R6: CH 1, turn, SC 19, SC 2 together.
R7-9: CH 1, turn, SC into each ST for the entire row (20 total).
R10: CH 1, turn, SC 2 into the first ST, SC 1 into each ST for the rest of the row (21 total).
R11: CH 1, turn, SC 2 together, SC 1 into each ST for the rest of the row (20 total).
R12: CH 1, turn, SC 2 into the first ST, SC 1 into each ST for the rest of the row (21 total).
R13: CH 1, turn, SC 2 together, SC 1 into each ST for the rest of the row (20 total)
R14: CH 1, turn, SC 2 into the first ST, SC 17, SC 2 together.
R15: CH 1, turn, SC 2 together, SC 1 into each ST for the rest of the row (19 total).
R16: CH 1, turn, SC 2 into the first ST, SC 16, SC 2 together.
R17: CH 1, turn, SC 2 together, SC 1 into each ST for the rest of the row (18 total)
R18: CH 1, turn, SC 2 into the first ST, SC 1 into each ST for the rest of the row (19 total).
R19: CH 1, turn. Skipping the first ST, SC 2 together. SC 1 into each ST for the rest of the row (17 total).
R20: CH 1, turn, SC 2 together, SC 13. We will leave the rest of the row unworked.
R21: Without chaining, turn. Skipping the first ST, SC 2 together. SC 9, SC 2 together.
R22: CH 1, turn, SC 9, SC 2 together. (10 total)
R23: CH 1, turn. Skipping the first ST, SC 2 together. SC 7.
R24: CH 1, turn, SC 1 into each ST for the entire row (8 total).
R25: CH 1, turn, SC 7, SC 2 into the last ST.
R26: CH 1, turn, SC 1 into each ST for the entire row (9 total).
R27: CH 1, turn, SC 8, SC 2 into the last ST (10 total). R28: CH 1, turn, SC 2 into the first ST, SC 9 (11 total).
R29-30: CH 1, turn, SC 1 into each ST for the entire round (11 total). R31: CH 1, turn, SC 2 into the first ST, SC 9, SC 2 into the last ST (13 total).
R32: CH 1, turn, SC 1 into each ST for the entire row (13 total).
R33: CH 1, turn, SC 11, SC 2 together (12 total). R34: CH 1, turn, SC 1 into each ST for the entire row (12 total).
R35: CH 1, turn, SC 10, SC 2 together (11 total).
R36: CH 1, turn. Skipping the first ST, SC 2 together. SC 8 (9 total).
R37: CH 1, turn, SC 2 into the first ST, SC 5. We will leave the rest of the row unworked.
R38: CH 1, turn, SC 1 into each ST for the entire row (7 total).
R39-45: Repeat R38.
R46: CH 1, turn, SC 2 together, SC 3, SC 2 together.
R47: CH 1, turn, SC 2 together, SC 1, SC 2 together.
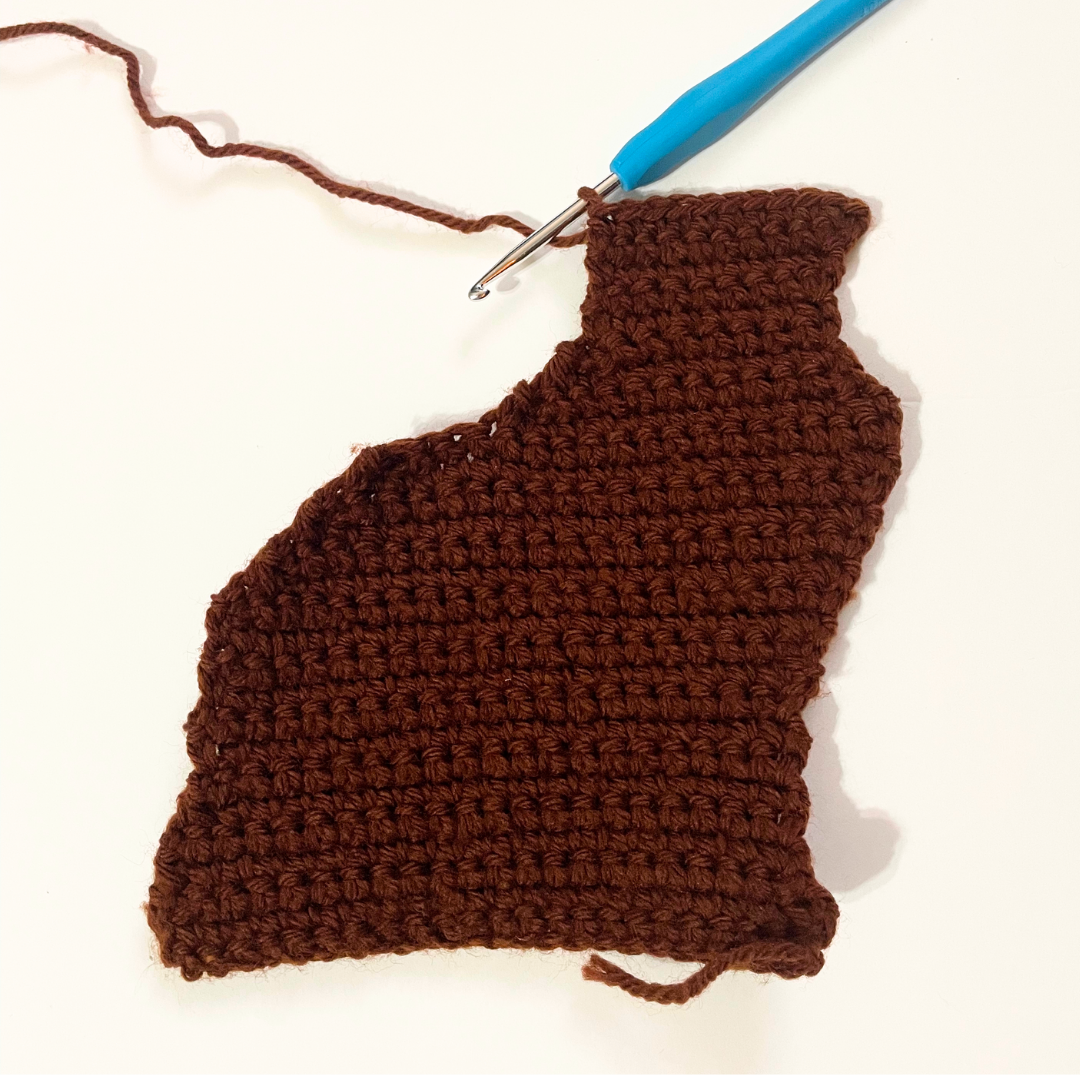
R48: CH 1, turn. SC around the entire edge of the shape until you have reached the CH 1 again. The spaces may not be well defined. Just be sure to space your stitches evenly. SL into the CH 1 space.
R49: CH 1, SC 1 into each ST all the way around the edge again, placing 2 SC into each of the stitches at the corners of the feet. SL into the CH 1 space, tie off and weave in any yarn ends.
Assembly
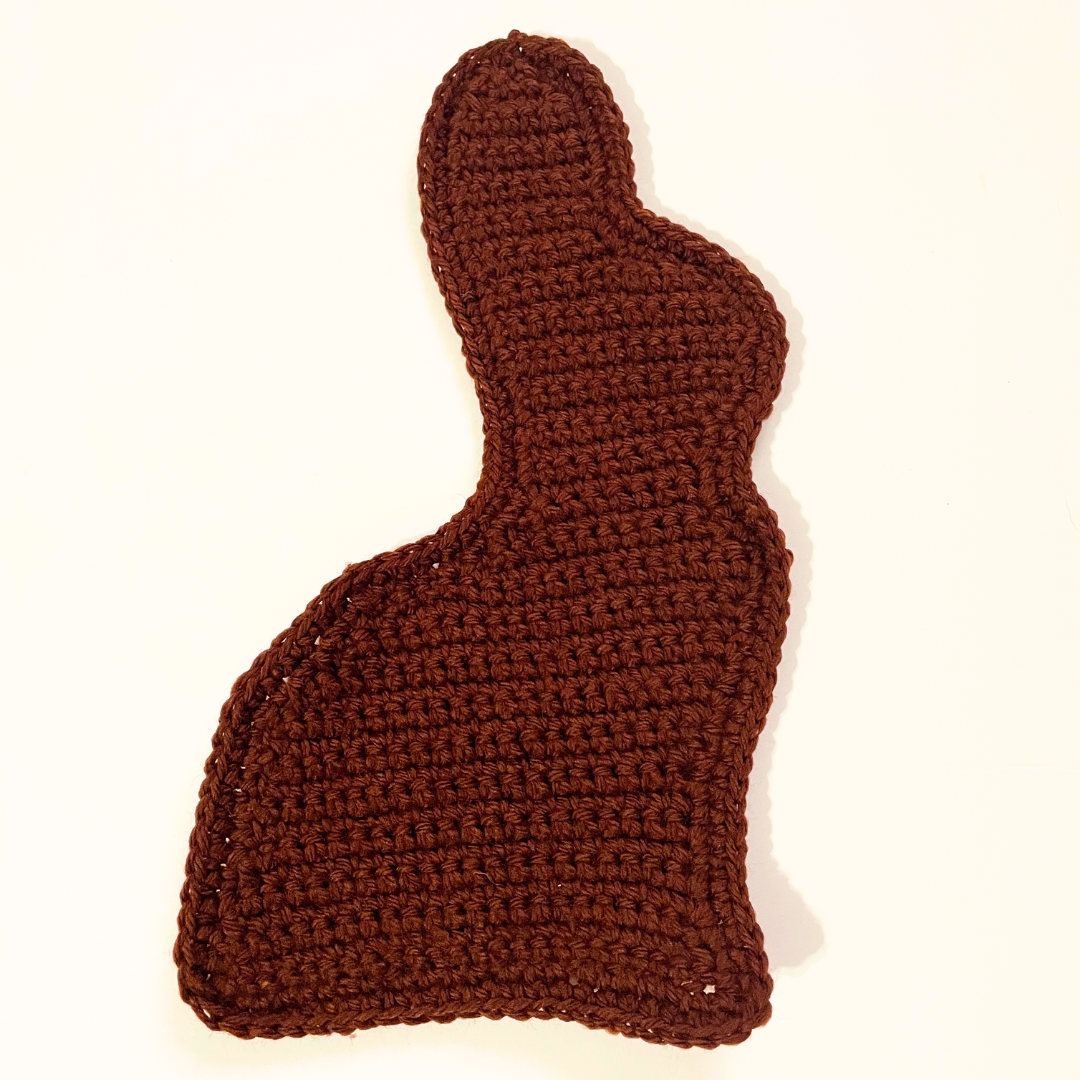
Once you have created 2 identical halves of the chocolate bunny, sew each half together with a tapestry needle or by slip stitching together the back loop of the top half with the front loop of the bottom half all the way around the edge.
Be sure to leave space to add the polyester filling as you go. Add a bow if you’d like and you have finished your chocolate bunny!
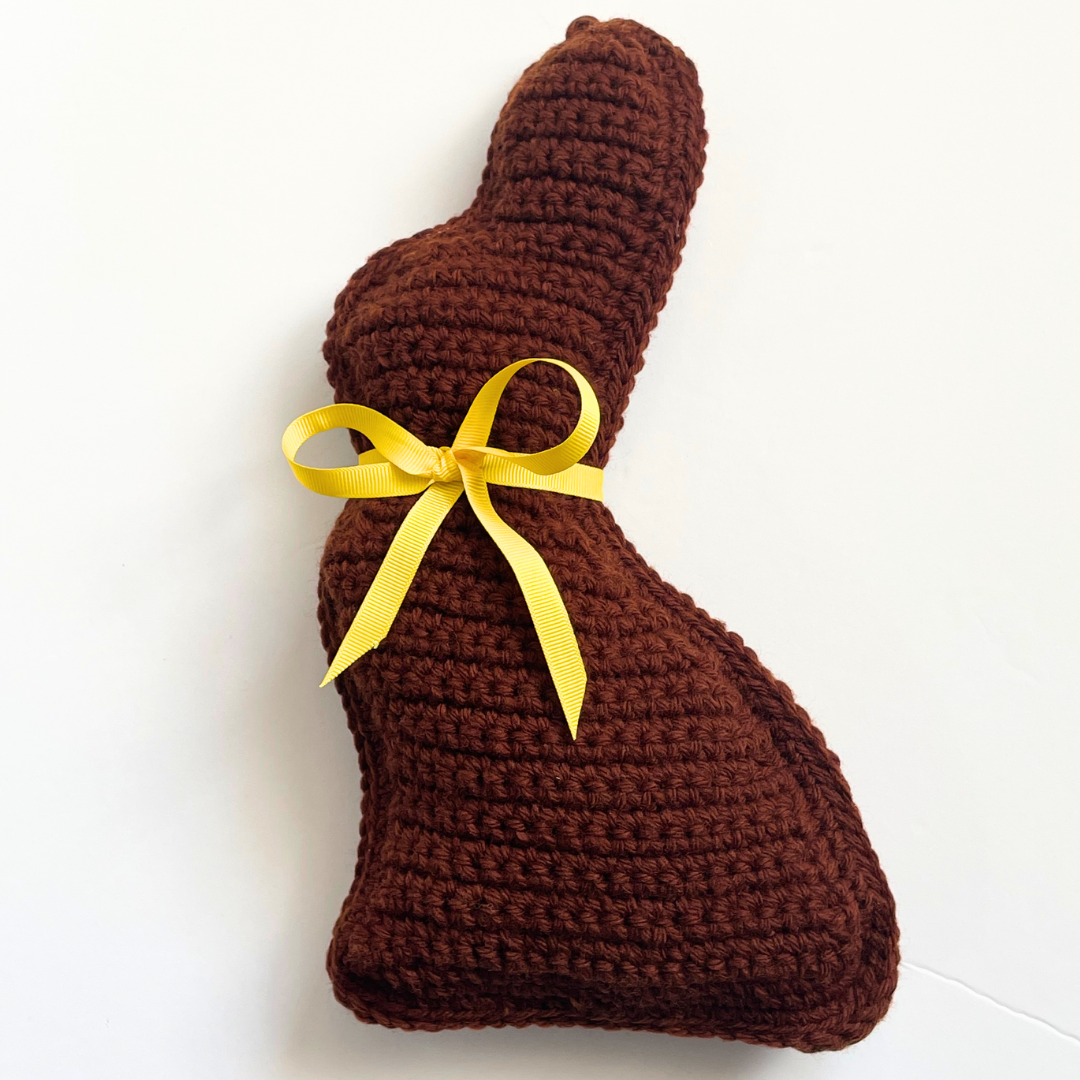
In this free crochet pattern, you learned how to crochet a chocolate Easter bunny!
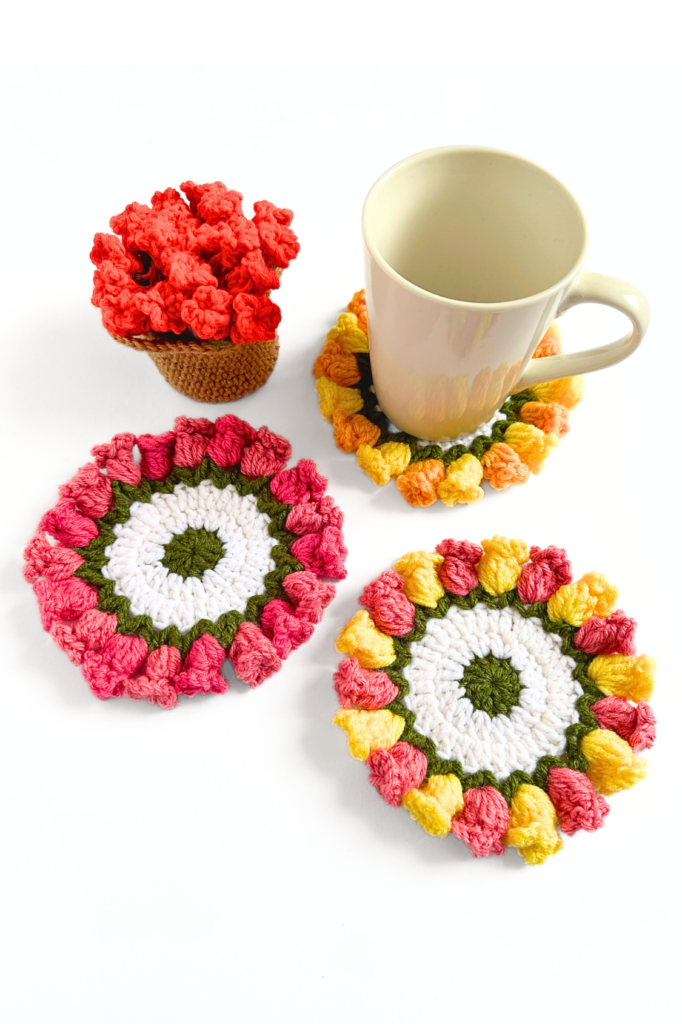
{If you enjoyed this pattern, you’ll love this one: Flower Pot Coaster Set FREE Crochet Pattern + Video Tutorial}
©2024 HyggeCrochetCo All rights reserved. This pattern and its contents are for personal use only. Do not copy, edit, redistribute, or sell this pattern. You are welcome to sell finished products with your own photos in small quantities with credit to HyggeCrochetCo. Thank you and enjoy!