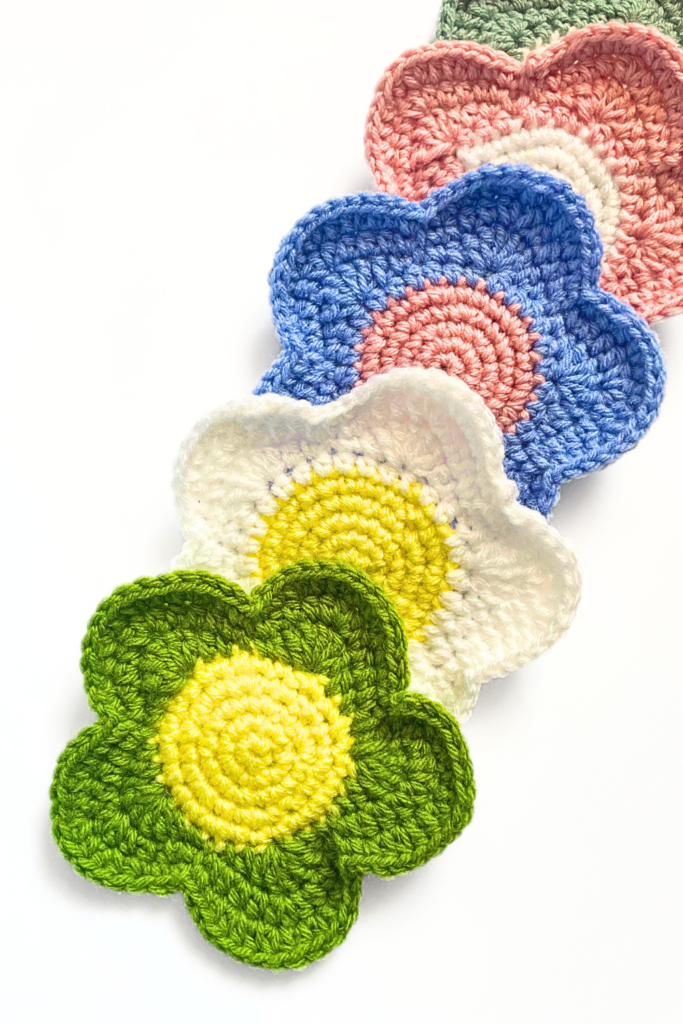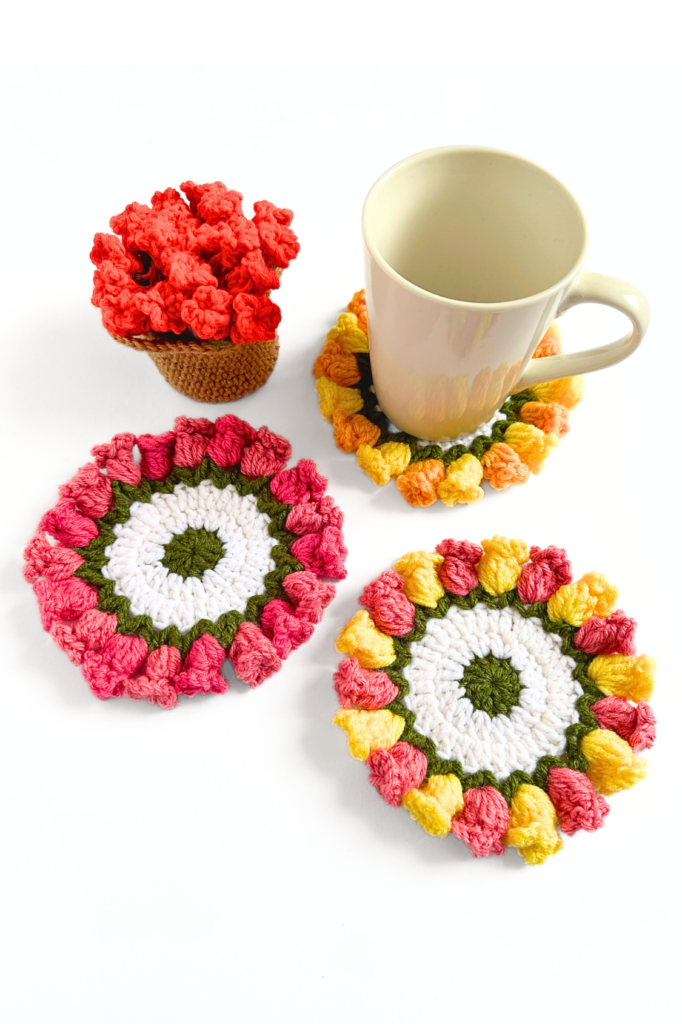
This fun and functional flower pot coaster set crochet pattern doubles as a cute decor piece and also as a beautiful flower bouquet complete with its own basket! If you’ve been looking for the perfect handmade gift idea and love free crochet patterns – this one is for you!
This crochet flower pot coaster set is the perfect addition to your space all year long in a variety of color combinations or as a handmade gift for Mother’s Day or Valentine’s Day.

Want the full AD-Free, printable PDF version of this pattern? Click here to get it on Etsy

Add this pattern to your Ravelry Queue and Favorites
For this project, I’m using Lily Sugar’N Cream 100% cotton yarn as it is my favorite both soft and durable cotton yarn. Any worsted-weight 4 cotton yarn will work for your coasters, however. It is best to use cotton yarn for coasters and trivets as it is better suited to high temperatures, unlike other yarns such as acrylic. If you are using your coasters purely for decorative purposes, feel free to use other yarn types!
For more on the best yarn for your next project, check out our articles: Best Cotton Yarn for Crochet: The Complete GuideThe Benefits of Wool Yarn for CrochetIs Acrylic or Cotton Yarn Better for Crochet? More cotton yarn options for this project include: Knit Picks – Dishie Cotton YarnPremier Yarns – Home Cotton Yarn
Materials
Medium Weight 4 Yarn – Lily Sugar’N Cream 100% Cotton
4mm Hook (My FAVORITE crochet hooks!)
Optional – Stitch Markers
Optional – Stitch Counter
Both stitch markers and stitch counters are very helpful for those who easily lose track of their row/stitch counts.
STITCHES & TECHNIQUES
CH – Chain
SL – Slip Stitch
ST – Stitch
SC – Single Crochet
DC -Double Crochet
BLO – Back Loop Only
PATTERN NOTES
Skill Level – Advanced Beginner/Intermediate
Measurements – 6″ x 6″
Gauge – 20 CH = 4″
This pattern follows US crochet terms.
The success of this pattern is not dependent upon yarn type or gauge, however, it is recommended to use cotton or wool yarn for hot drink coasters as they are better suited to high temperatures.
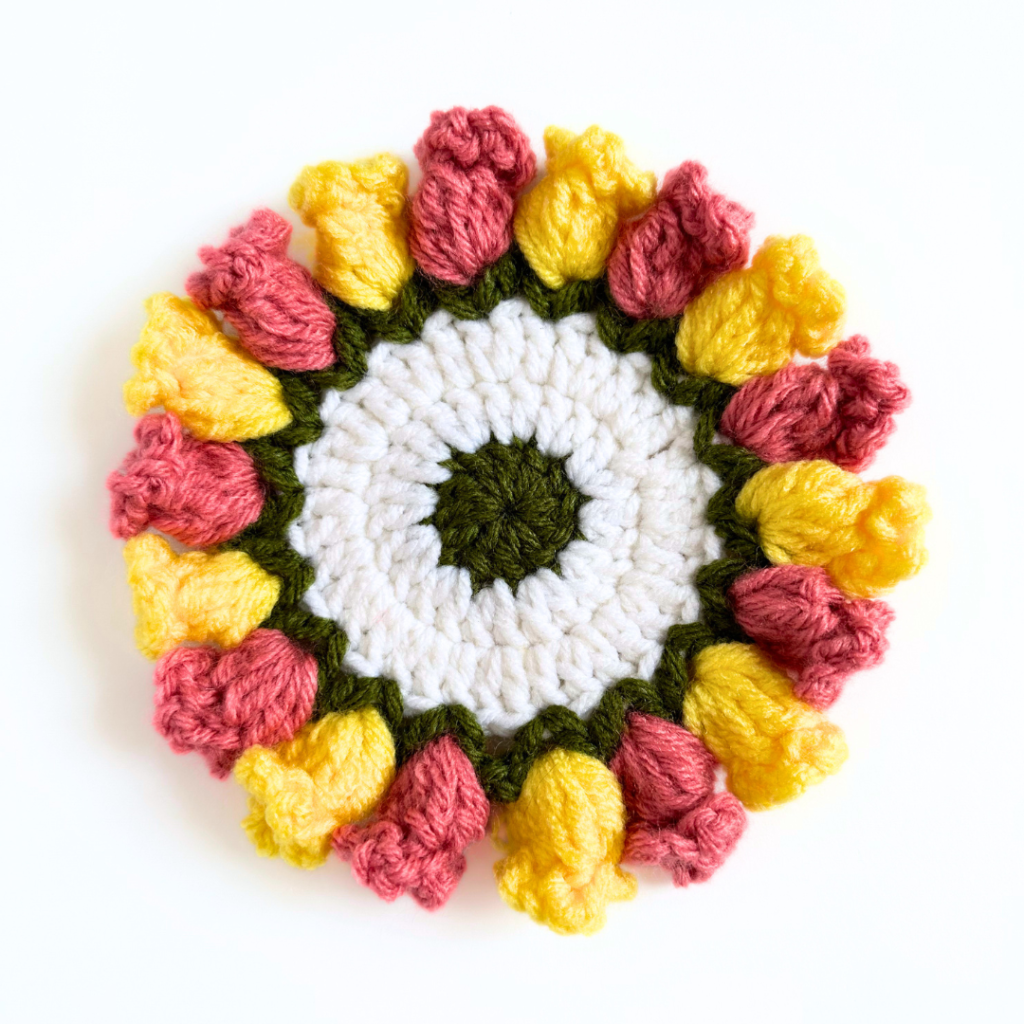
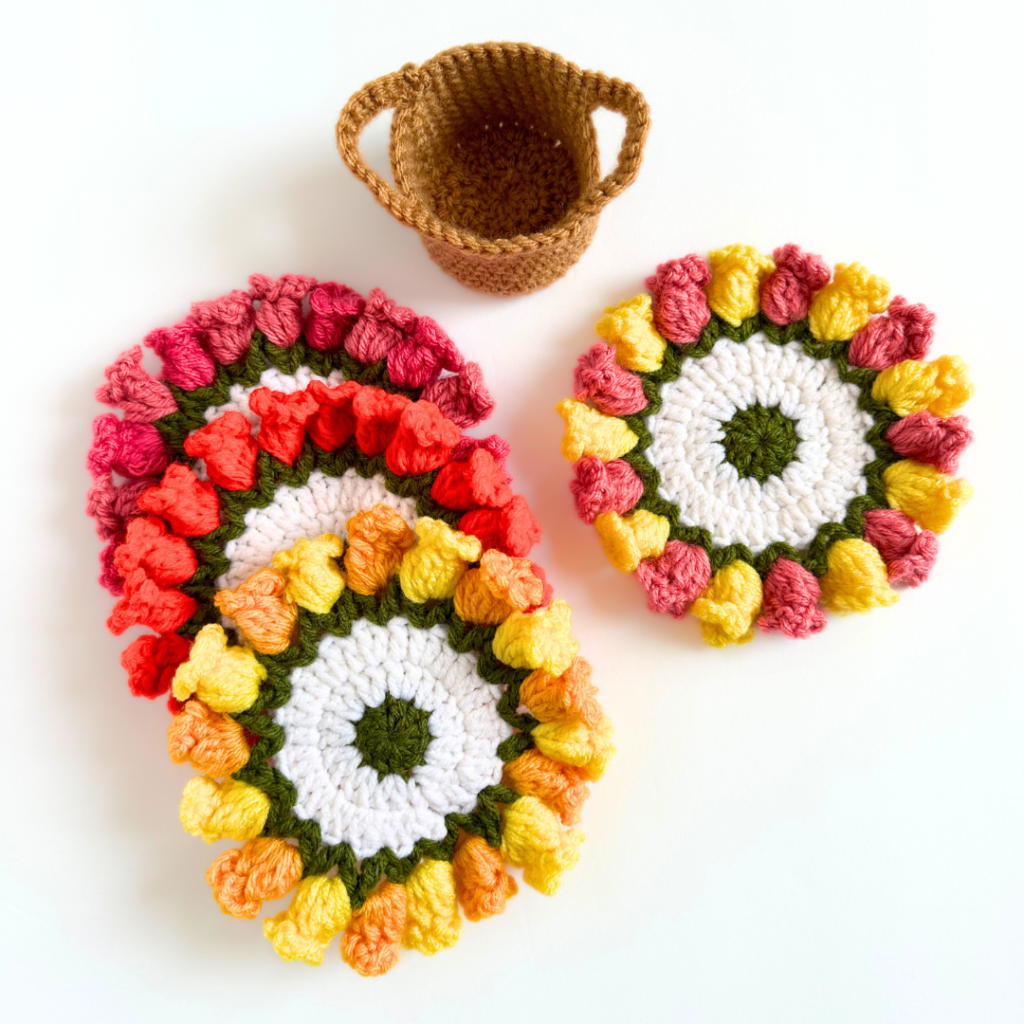
FLOWER POT COASTERS CROCHET PATTERN
Flower Coaster
R1: To begin, create a magic circle. CH 2 (this will count as one DC), DC 11 into the magic circle, SL into the CH 2 space. If you are switching yarn colors, tie off.
R2: CH 2, DC 1 into the same space. DC 2 into each ST for the entire round (24 total), SL into the CH 2 space.
R3: CH 2, DC 2 into the next ST. DC 1 into the following ST. Repeat this pattern for the entire round (DC 2 same space, DC 1, DC 2 same space, DC 1…) (36 total), SL into the CH 2 space. Tie off.
R4: Attach the green yarn to the edge of the circle. CH 4, DC 1 into the same space. [ Skip 1 ST, DC 1 into the next ST, CH 2, DC 1 into the same space] X18, SL into the CH 4 space, tie off.
R5: To create the flowers, begin by attaching the yarn to one of the CH 2 spaces created in the previous round. CH 2. Create 3 puff stitches.
To create the puff stitch: Yarn over, pull up a loop, pull through 2 loops on the hook. Yarn over, pull up a loop (you should have 3 loops on the hook), pull through all loops. Move the hook into the top of the first puff stitch, then pick the loop back up. SL 1 to create the body of the flower. CH 3, SL into the same space. CH 3, SL into the next ST.
Repeat this around the top edge of the flower a total of 5 times. Tie off. Weave the yarn tail through the middle of the flower to hide it. Repeat R5 into each CH 2 space created in R4 to complete the coaster.
Flower Basket
R1: To begin, create a magic circle. CH 2 (this will count as 1 DC), DC 11 into the magic circle, pull gently on the yarn tail to close the circle, SL into the CH 2 space.
R2: CH 2, DC 1 into the same space. DC 2 into each ST for the entire round (24 total), SL into the CH 2 space.
R3: Ch 2, DC 2 into the next ST, DC 1 into the following ST. Repeat this pattern for the entire round (DC 2 same space, DC 1, DC 2 same space, DC 1…) (36 total), SL into the CH 2 space. For a larger basket, add rounds before R4.
R4: CH 1, SC BLO into each ST for the entire round (36 total), SL into the CH 1 space.
R4-11: Repeat R4
R12: CH 1, SC 12, CH 12. Skipping 6 ST, SC 12. CH 12, skipping 6 ST, SC into the last ST. SL into the CH 1 space.
R13: CH 1, SC into each ST for the entire round including the chains created in the last round to create the basket handles. SL into the CH 1 space, tie off & weave in any yarn ends.
In this free crochet pattern, you learned how to make your very own flower pot coaster set!
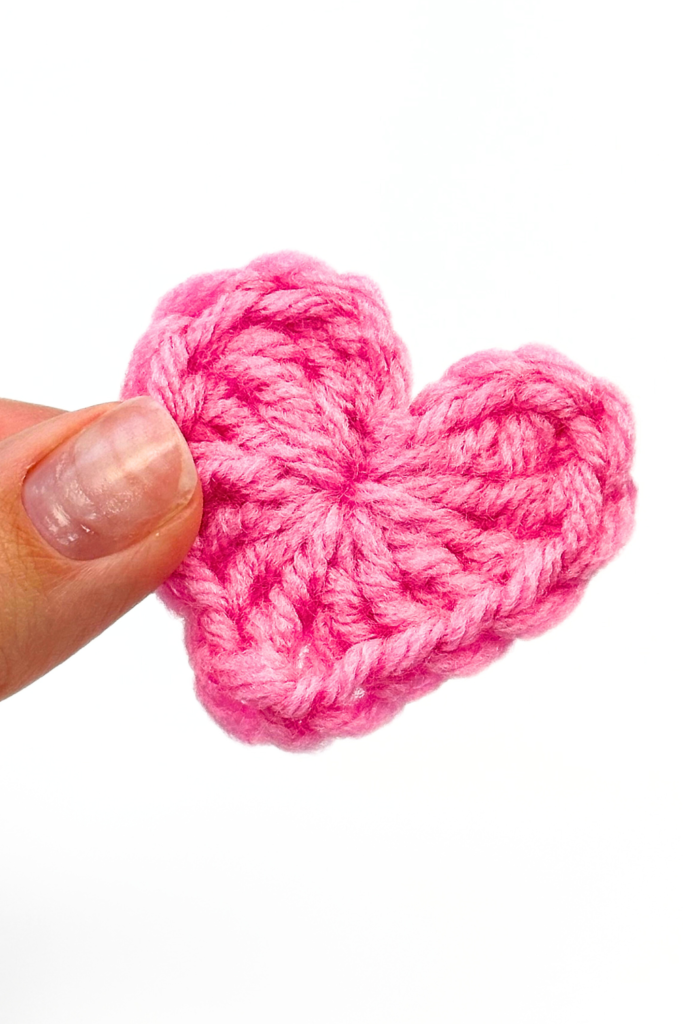
{If you enjoyed this pattern, you’ll love this one: How to Crochet a Heart + Video Tutorial}
©2024 HyggeCrochetCo All rights reserved. This pattern and its contents are for personal use only. Do not copy, edit, redistribute, or sell this pattern. You are welcome to sell finished products with your own photos in small quantities with credit to HyggeCrochetCo. Thank you and enjoy!